Template preparation
The Template Preparation page is the main editor for building and configuring your templates — where you place and set up fields for each participant before sending. It is also where you add Sender Fields — fields the sender fills in at send time to personalise each document, similar to mail merge fields in Word.
Click a Template in the Library to visit its Template Preparation page.
Each Signer or Witness needs to have at least one signature field, but not Approvers.
On the left is a panel that controls general settings, recipients, and field.
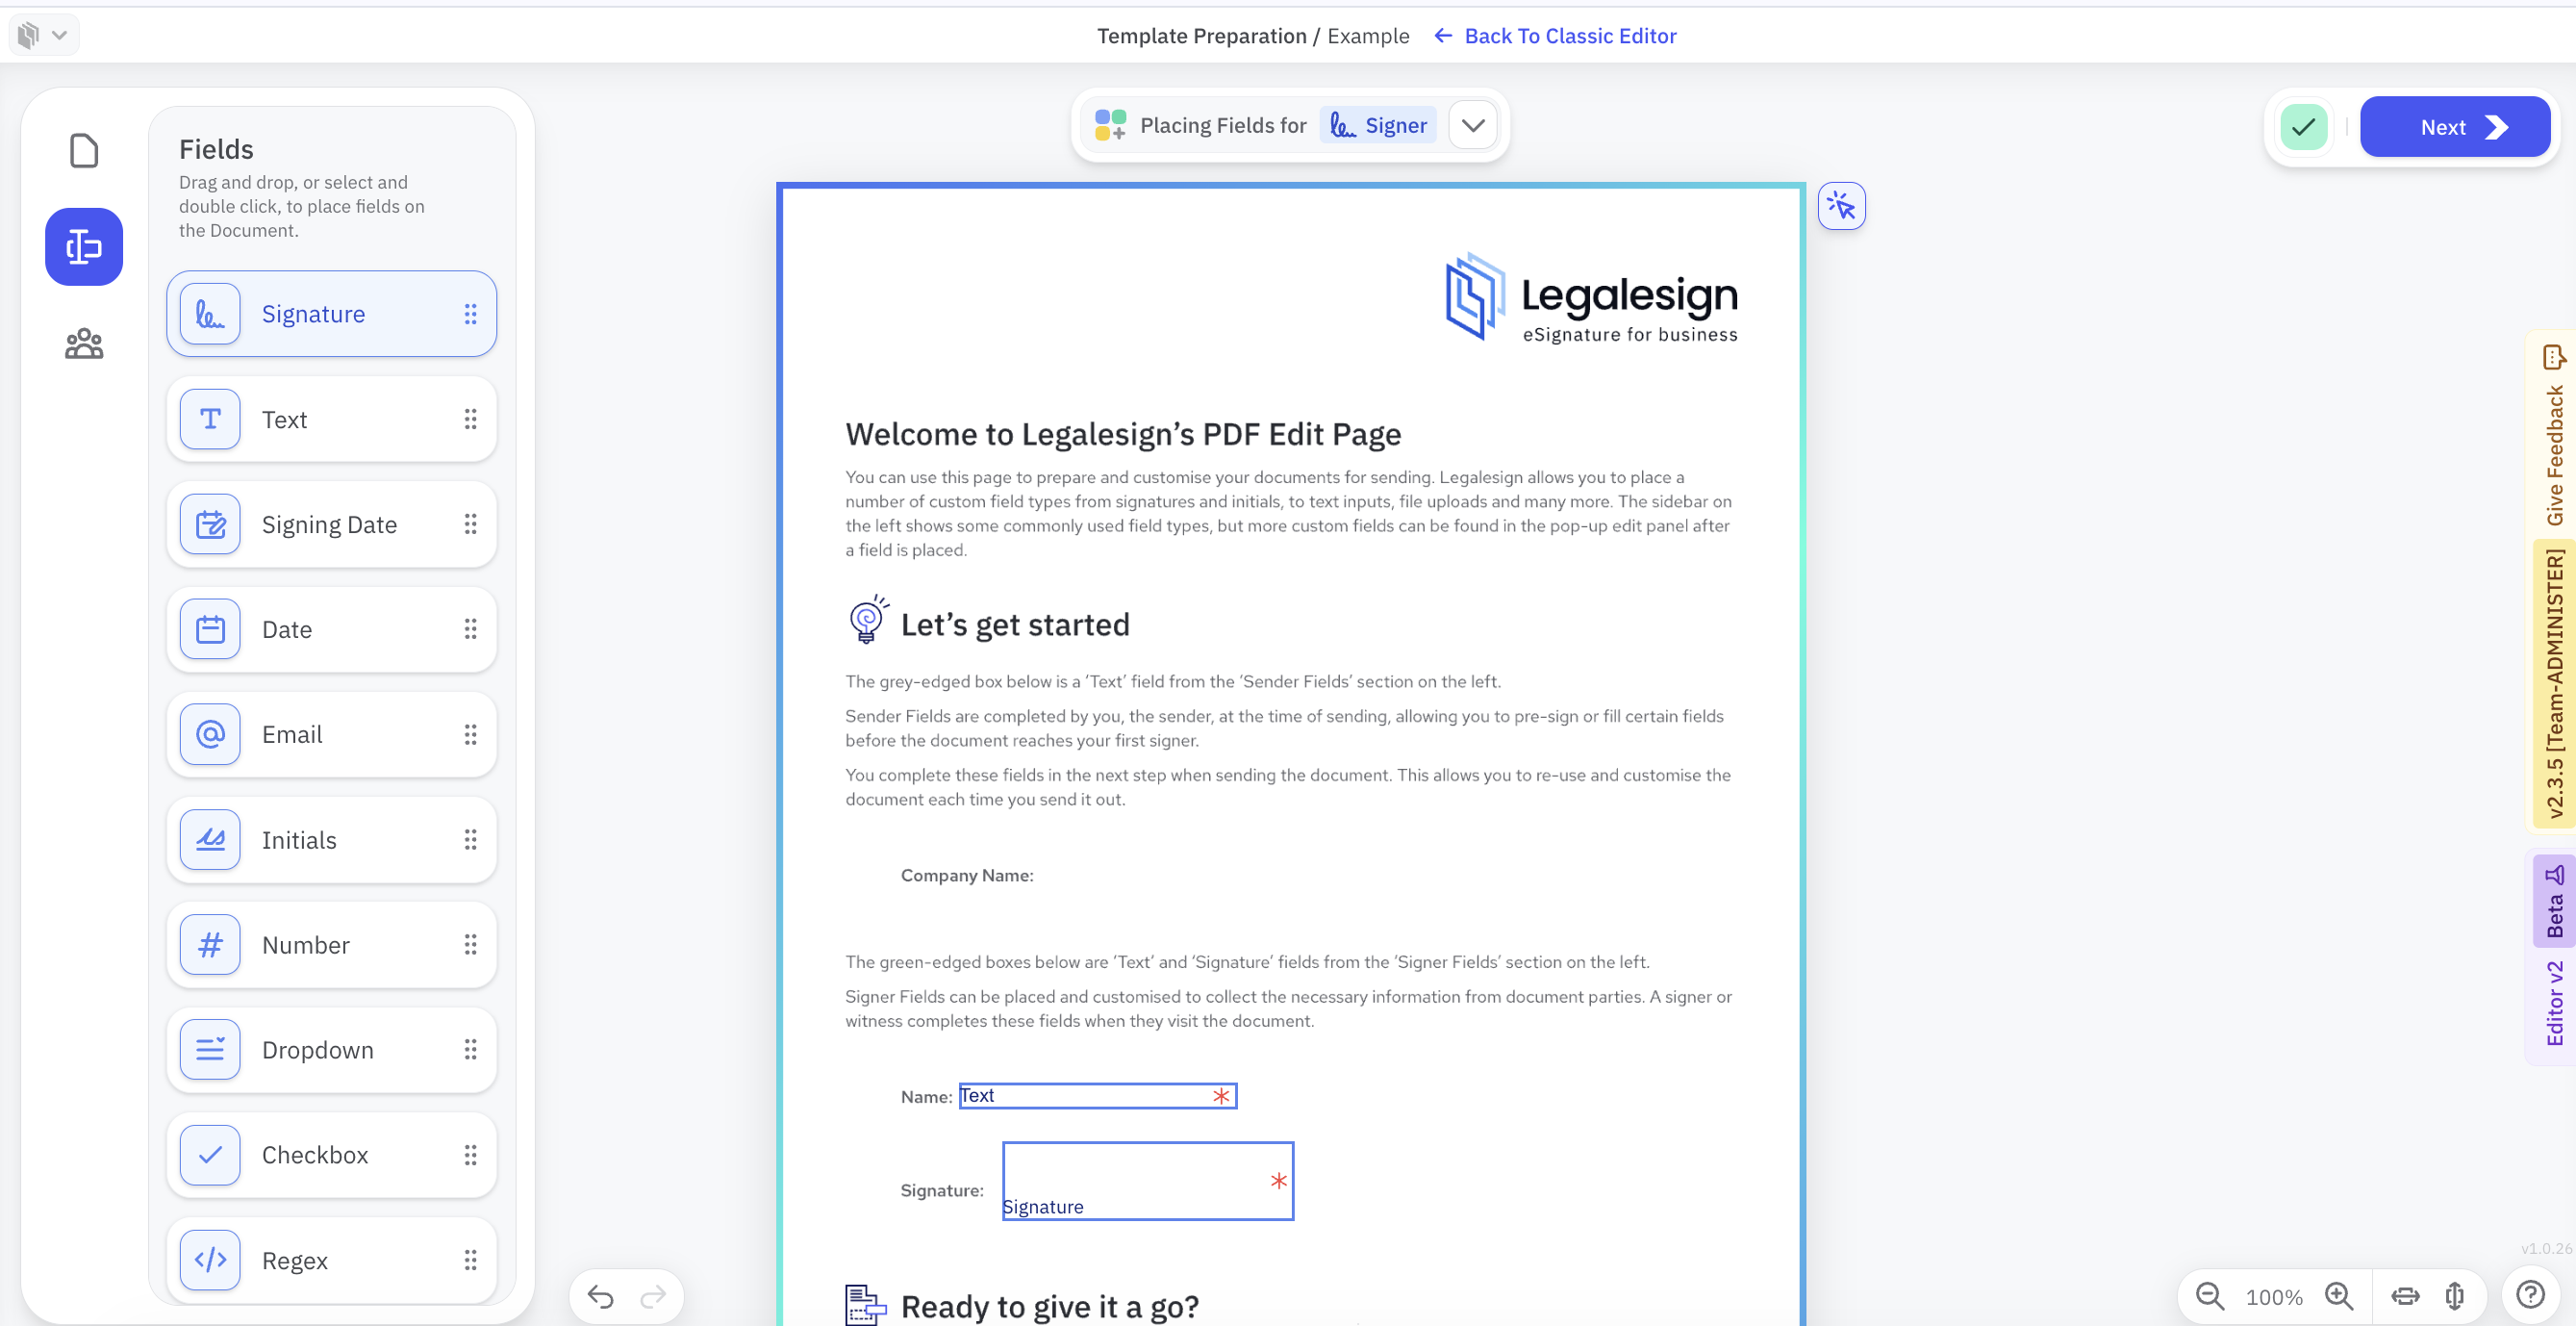
The panel has two states - one set of options if you have selected a field and another set if you have not.
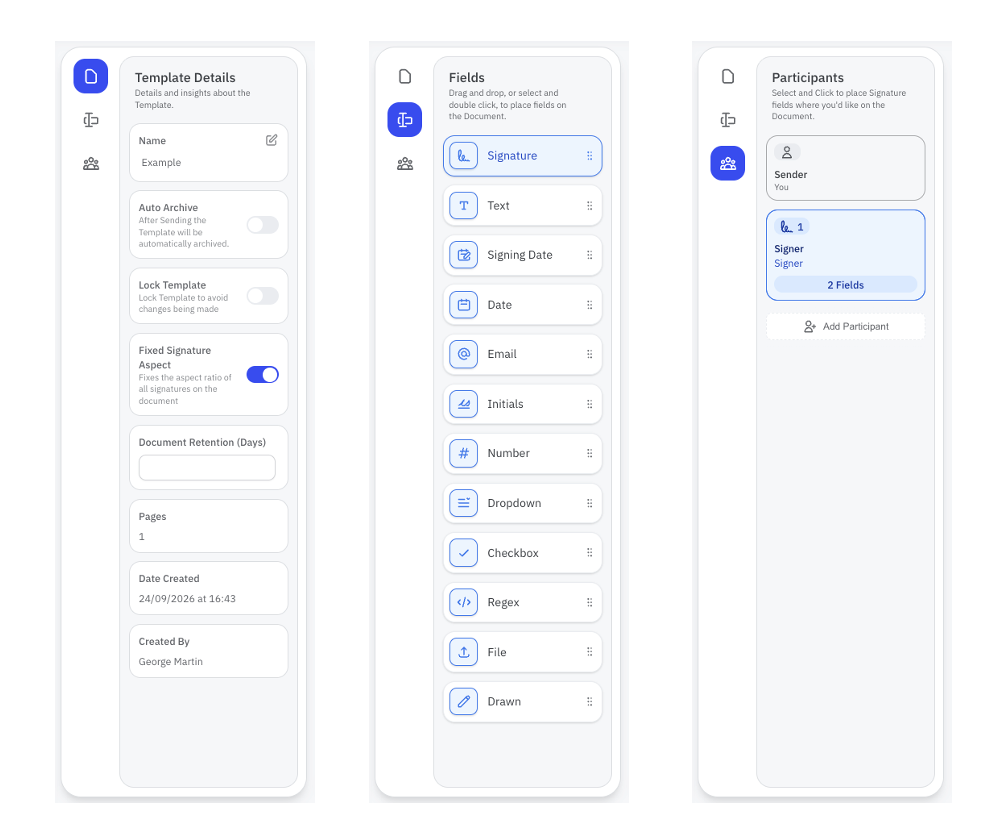
Upon arrival, no field is selected and you will see 3 icons for sub-sections to:
-
Add fields - a list of Drag and Drop Fields.
-
Update document settings - change the document name, lock fields, and 'auto-archive' (archive a one-use document after sending).
-
Manage Participants - add, label or remove signers, witnesses and/or approvers.
The image below shows those options. No field is selected. Clicking through the icons on the left produce different sub-section.
When a field is selected, the panel will change to the Field Properties menu. This is split into three parts: Content, Placement, and Dimensions.
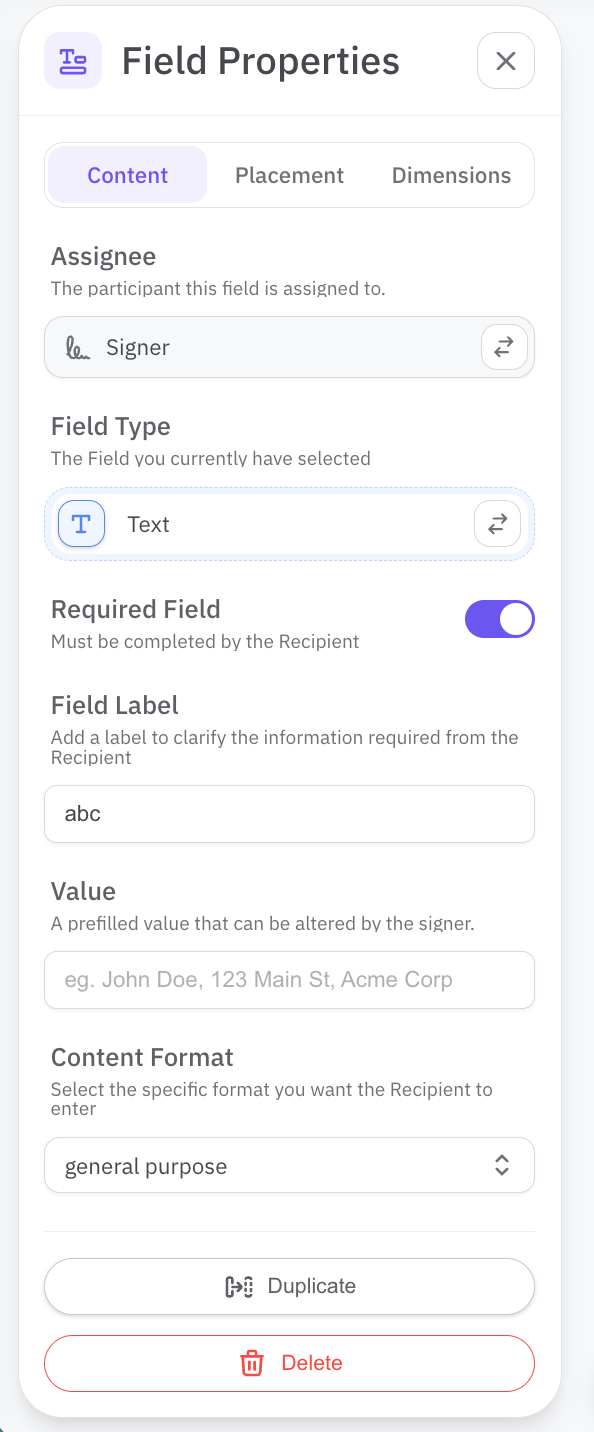
The Content menu changes assignment values - the label, ordering, signer (or approver or witness), pre-set value, and validation.
The Placement menu enables pixel-precise positioning, with features for aligning multiple fields (drag your mouse over fields for multi-select). Read more about positioning and alignment.
The Dimensions menu enables pixel by pixel height and width, and multi-field features to help align several fields at once.
In all cases, when a field is selected, font size, font type and alignment will be in the menu bar at the top of the document.
Go to the Content tab and pan down to find the Advanced menu, click it for options to:
-
Add Forms Logic variables including Ref. Name, Link Field, and Link Value.
-
Set Exclude from PDF if you don't want the field to be printed on the final document.
Shortcuts & tips
- SHIFT + click also works to select multiple fields, alongside clicking and mouseing-over fields — you can then move, duplicate, align, or resize them all together.
- Arrow keys to nudge selected fields into position.
- D to duplicate a selected field (select multiple fields first to duplicate them all), read more.
- The arrow icon at the top right corner of the page opens a menu for multi-select.
- Use the 'undo'/'redo' icons in the bottom left corner to reverse or repeat your actions.
Related
- Templates, fields, and the preparation workflow
- How to upload a Template
- Sender Fields
- Position or align multiple fields
- Resize fields
- Duplicate fields
- Label fields
- Field order
- Forms Logic
- Lock a Template
Next step
- Standard Send — send your prepared template as a document