Roles and how to add Participants
Participants are parties added on to a Template who need to carry out certain actions to make sure the document is completed. Participants are assigned a Recipient on the Recipients page upon sending.
For the model behind roles, order, and workflow structure, see Participant Roles and Workflow Types.
Each Participant has a Role, depending on the type of action they'll be doing in the document. There are four Roles:
-
Signer
-
Witness
-
Approver
-
Sender (you)
Add, change, or remove a participant by clicking on the Manage Participants button on the Edit Page. But there can't be any more or less than one Sender.
If the order of Participants needs to be rearranged, that can be done by dragging and dropping the list of Participants on the left of the page.
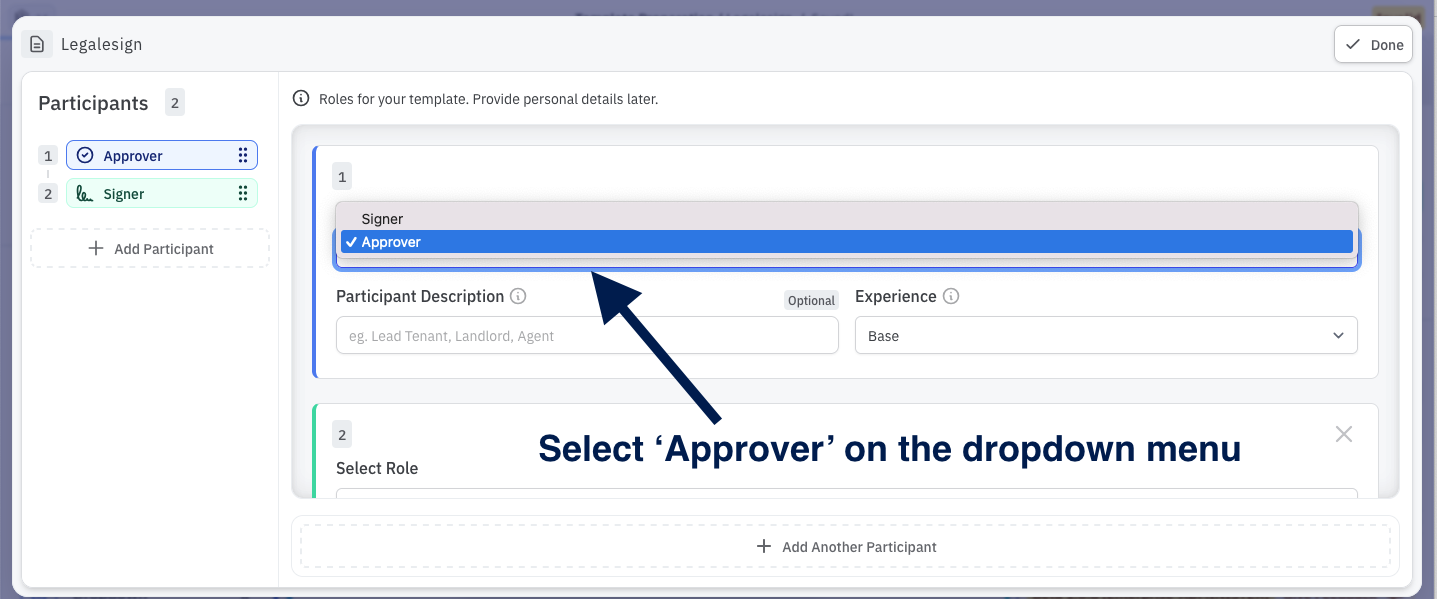
On the newly made Participant card, use the dropdown menu to select the Role
-
Signers will need at least one Signature field for a Template to be valid for sending.
-
Approvers do not sign the document but only approve it, they will need to be assigned at least one field (other than a signature) to a Template to be valid.
-
Witnesses must be assigned a Signer. Add them by clicking the +Add Witness for this Participant button.
-
The Sender is the party sending the document, they can be assigned fields to complete on the Edit page and can then fill them in on the Details page.
Approvers
An Approver is a participant who is not required to leave a signature. For example, a conveyancer may only need to date a deed before submitting it to HM Land Registry.
To add an Approver, create or edit a participant and select Approver from the Role dropdown.
Any fields completed by the Approver will appear on the final PDF unless you are using Exclude from PDF.
After receiving the document, the Approver can approve or reject it using the side panel. If the document is rejected, the Approver can also provide a reason.